Hello, fellow yarn lovers and ocean enthusiasts! Get ready to dive into a world of adorable, squishy goodness with our collection of Cute Sea Turtle Crochet Patterns That Are Simple To Make. Imagine a charming little turtle, with its sweet shell and friendly face, ready to become your new favorite amigurumi buddy. These little guys are so huggable and utterly delightful!
Whether you’re just dipping your toes into the magical world of crochet or you’re a seasoned pro looking for a quick and rewarding project, these patterns are perfect for you. They make the most wonderful handmade gifts for birthdays, baby showers, or just because! Plus, who wouldn’t love a little ocean-inspired charm on their shelves or as a quirky desk companion? In this article, you’ll learn all the simple stitches and techniques to bring these cuties to life, from their perfectly rounded shells to their happy little flippers. Let’s get crocheting!
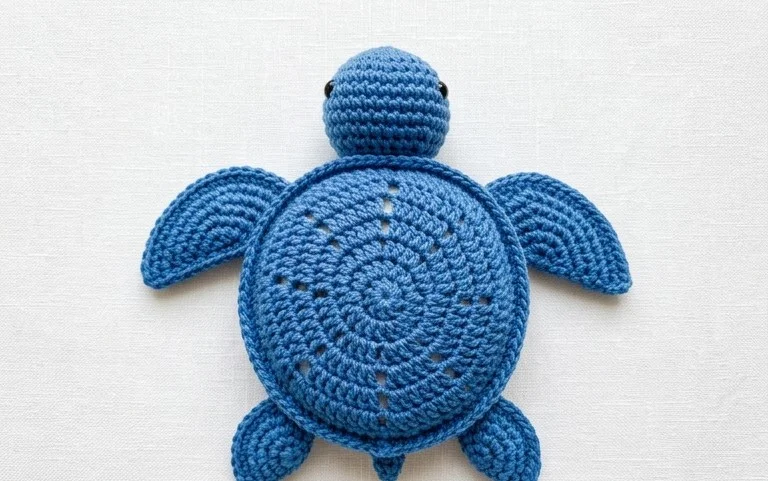
Dive into Adorable: Cute Sea Turtle Crochet Patterns That Are Simple to Make
Ahoy, fellow yarn enthusiasts! Have you ever felt the irresistible pull to create something undeniably cute and wonderfully whimsical? If your heart beats for the ocean and your hands itch to crochet, then get ready to be enchanted. Today, we’re embarking on a crafting adventure to explore some truly adorable sea turtle crochet patterns that are not only charming but also surprisingly simple to make. Whether you’re a seasoned crocheter looking for a quick and delightful project, or a beginner eager to dip your toes (or fins!) into amigurumi, these patterns are designed to bring smiles and sprinkle a little bit of oceanic magic into your life.
Why Sea Turtles?
Sea turtles are creatures of grace and resilience, and their gentle nature translates beautifully into crochet form. Their distinct shells, endearing flippers, and soulful eyes lend themselves perfectly to the tactile charm of handmade toys and decorations. Plus, with these simple patterns, you’ll be creating these little ocean dwellers in no time, making them perfect for gifts, craft fairs, or simply to brighten your own living space.
Yarn and Hook Recommendations: Charting Your Course
Choosing the right yarn and hook is like selecting the perfect compass for your crafting journey. For these cute sea turtle projects, you’ll want yarns that are soft, durable, and come in a delightful array of colors.
Yarn Type: Worsted weight yarn is your go-to for most amigurumi projects. It offers a good balance of stitch definition and a soft, cuddly feel. Cotton or a cotton blend is excellent as it holds its shape well and is less prone to stretching, which is ideal for stuffed toys. Acrylic yarns are also a fantastic, budget-friendly option.
Hook Size: For worsted weight yarn, a hook size between 3.5mm (US E/4) and 4.5mm (US 7) is generally recommended. The exact size will depend on your tension and the specific yarn you choose. A slightly smaller hook than recommended on the yarn label often helps create tighter stitches, preventing stuffing from peeking through.
Color Palette: Embrace the ocean! Think earthy greens, sandy beiges, sunny yellows for the shells, and a variety of blues and teals for the body. Don’t be afraid to get creative with brighter, more whimsical colors too – these turtles are all about fun!
Essential Stitch Techniques: Mastering the Craft
These simple sea turtle patterns rely on a few fundamental crochet stitches. If you’re new to crochet, these are the building blocks you’ll want to familiarize yourself with.
Magic Ring (or Magic Circle): This is your best friend for creating seamless, tight beginnings for amigurumi pieces, especially the head and body. It allows you to create a closed circle with no hole in the center.
Single Crochet (sc): The workhorse of amigurumi! Single crochet creates a dense fabric that’s perfect for stuffed toys.
Increase (inc): This stitch involves working two single crochets into the same stitch, helping your piece to grow in circumference.
Decrease (dec): This stitch involves working two stitches together as one, allowing your piece to taper and shape. The most common method is the invisible decrease, which helps maintain a smooth look.
Slip Stitch (sl st): Used for joining rounds and finishing off.
Stitch Multiplier (e.g., 2sc in next st): Sometimes patterns will specify a certain number of stitches in one stitch.
Many patterns will also involve working in continuous rounds. This means you won’t join the end of each round with a slip stitch and chain; instead, you’ll keep crocheting in a spiral, using a stitch marker to keep track of the beginning of each round. This creates a smoother, seamless appearance.
Tips for Beginners: Navigating the Waters with Ease
Embarking on your first amigurumi project can feel a little daunting, but with these tips, you’ll be crocheting cute sea turtles like a pro in no time!
Read the Pattern Thoroughly: Before you even pick up your hook, read the entire pattern from beginning to end. This helps you understand the flow of the project and anticipate any tricky steps.
Use a Stitch Marker: Seriously, this is a game-changer for working in the round. Place a marker in the first stitch of each round to know where you are.
Stuffing is Key: Don’t be shy with the stuffing! Stuff your turtle firmly but not so much that the stitches stretch and the stuffing shows. Stuff as you go, especially in smaller parts like the flippers and head.
Weave in Your Ends Neatly: This is crucial for a professional-looking finish. Use your yarn needle to weave in ends securely and invisibly.
Don’t Be Afraid to Undo: If you make a mistake, it’s okay! Frogging (undoing your stitches) is part of the process. It’s better to fix it early than to have to unravel a larger section later.
Practice Tension: Consistent tension is important for amigurumi. If your stitches are too loose, try a smaller hook. If they’re too tight, try a slightly larger one.
Safety Eyes: For added charm and safety, consider using safety eyes. Make sure to place them before you fully stuff the head so they can be secured properly from the inside.
Customization Ideas: Adding Your Personal Splash
These patterns are fantastic starting points, but the real fun comes when you add your own unique flair!
Color Play:
Shell Variations: Instead of a solid shell, try incorporating stripes or color blocks. You could even use a variegated yarn for a naturally marbled effect.
Contrast Flippers: Make the flippers a contrasting color to the body for a fun pop.
Embellishments: Add small embroidered details like spots or patterns on the shell.
Size Matters:
Larger Turtles: Use a heavier weight yarn (like bulky or super bulky) and a larger hook to create a cuddly, oversized sea turtle.
Smaller Turtles: Opt for a finer weight yarn (like sport or DK) and a smaller hook for adorable miniature sea turtles that are perfect for keychains or delicate decorations.
Personal Touches:
Embroidered Faces: While safety eyes are wonderful, you can also embroider eyes and a mouth for a softer, more unique look.
Add a Bow or Accessory: A tiny crocheted bow on the head or a little crocheted starfish attached to the shell can add extra personality.
Caring for Your Ocean Friends: Keeping Them Shipshape
Once your adorable sea turtle is complete, a little care will ensure it brings joy for years to come.
Washing: Most cotton or acrylic creations can be hand-washed in cool water with a mild detergent. Gently squeeze out excess water (don’t wring!) and lay flat to dry.
Drying: Always lay your amigurumi flat to dry to prevent stretching and maintain its shape. Avoid direct sunlight for extended periods, as it can fade colors.
Spot Cleaning: For minor spills or marks, spot cleaning with a damp cloth and a tiny bit of mild soap is often sufficient.
Project Ideas: Where Your Turtles Will Roam
These cute sea turtles are incredibly versatile. Here are a few ideas to inspire you:
Cuddly Companions: Of course, the primary use is as a huggable toy for children (or adults who are young at heart!).
Nursery Decor: Imagine a mobile with a few of these little turtles, or a shelf filled with them as charming nursery decor.
Keychain Charms: Make them small and attach a keychain ring for a cute accessory for bags or backpacks.
Holiday Gifts: These make wonderfully thoughtful and handmade gifts for birthdays, baby showers, or just because.
Craft Fair Stars: Their undeniable cuteness makes them fantastic items for local craft fairs.
Amigurumi Garden: Create a little themed display for your home, perhaps with some crocheted coral or anemones!
So, are you ready to dive in? These simple sea turtle crochet patterns are a perfect way to unleash your creativity and bring a little piece of the ocean into your home. Grab your yarn, pick up your hook, and let the enchanting world of crochet sea turtles unfold before you! Happy crocheting!
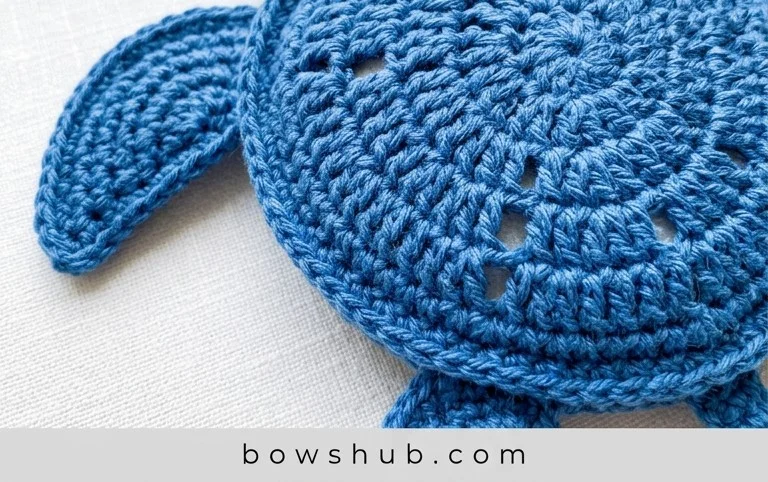
We hope you’ve enjoyed exploring these delightful and beginner-friendly sea turtle crochet patterns! They truly are a joy to create, and the results are incredibly rewarding. Don’t delay – grab your hook and yarn, and give one of these little guys a try. We can’t wait to see your finished masterpieces!
Feel free to get creative! Perhaps you’ll add some unique shell patterns, experiment with different color combinations, or even turn your turtle into a keychain or a charming applique. Once your turtle is complete, we’d love for you to share your adorable creations on social media using the hashtag #CuteCrochetTurtles. And if you’re craving more crochet fun, be sure to browse our collection of other charming patterns. Happy crocheting!